
Getting started with react routers
Routing in our React application, using the react router.

Innovative front-end developer committed to advancing user-friendly and scalable products, as well as high-performance, accessible web experiences
Hello React 👋
React Router is a standard library in React for routing that enables us to navigate between different components in our React app while keeping the UI in sync with the URL. Using routers in our React app improves the user's experience by simplifying navigation.
React routers let us build a declarative routing system for our application. Using React Router makes navigation between pages easier and faster. There is no need to reload the whole page, the amount of data rendered is less and the number of requests made to the server is reduced, hence boosting performance.
In this article, we are going to cover the basics of react routers. We are going to create a simple application with three components and navigate between them, but first let us look at the different react router components.
React Router Components
- BrowserRouter
The BrowserRouter uses the HTML5 history API to keep your UI up to date with the URL. ( The HTML5 history API lets users navigate back and forth their history and modify the site URL without full page reload ).
We need to import the BrowserRouter from the react-dom-router package to enable our client-side routing. BrowserRouter is also renamed as router.
import { BrowserRouter as Router} from 'react-router-dom'
- Switch
The switch component is a unique component that renders only the first route that matches the path among all it's children routes. This component makes sure that only one route is handled at a time.
import { BrowserRouter asRouter, Switch } from "react-router-dom";
- Route
The route is used to render and define components based on the specific path. It accepts two props - path and component. We can declare many routes but need to at least provide two props for each, path and component.
import { BrowserRouter as Router, Switch, Route } from "react-router-dom";

function App(){
  return (
    <Router>
      <switch>
        <Route path="/" component={home} />
        <Route path="/about"  component={about} />
        <Route path="/blog" component={blog} />
      </switch>
    </Router>
  )
}
The Path specifies the URL route to be navigated to, while the component specifies the page or the component that we want to render on that path. However we need to include another keyword exact so that it gives us the exact path.
- Link
The link component is used instead of the HTML <a> tag to create links that allows users to navigate between URLs, rendering it's contents without reloading the whole page.
The to keyword is used as opposed to using the href in the a tag.
import { BrowserRouter as Router, Switch, Route, Link } from "react-router-dom";

<Link to="/about">About</Link>
Let's Get Started
First we create-react-app and then install our react router package into the base of our project.
npx create-react-app routing-app
npm install react-router-dom
After installation, we cd into our project directory and start the dev server
cd routing-app
npm start
To be able to use the react router installed, we import the essential components from the react-router-dom into our App.js file.
import { BrowserRouter as Router, Switch, Route } from "react-router-dom";
import "./App.css";

function App() {
  return (
    <div className="App">
      <h1>Hello React</h1>
    </div>
  );
}


export default App;
In our src folder, create a new components folder and add 3 files named Home.jsx, About.jsx and Blog.jsx to the component folder.
Let us add some code to the newly created files.
- Home.jsx
import React from "react";

const Home = () => {
  return <div  className="message">Welcome to our Home Page!</div>;
};

export default Home;
- About.jsx
import React from "react";

const About = () => {
  return <div className="message">Know more about us!</div>;
};

export default About;
- Blog.jsx
import React from "react";
const Blog = () => {
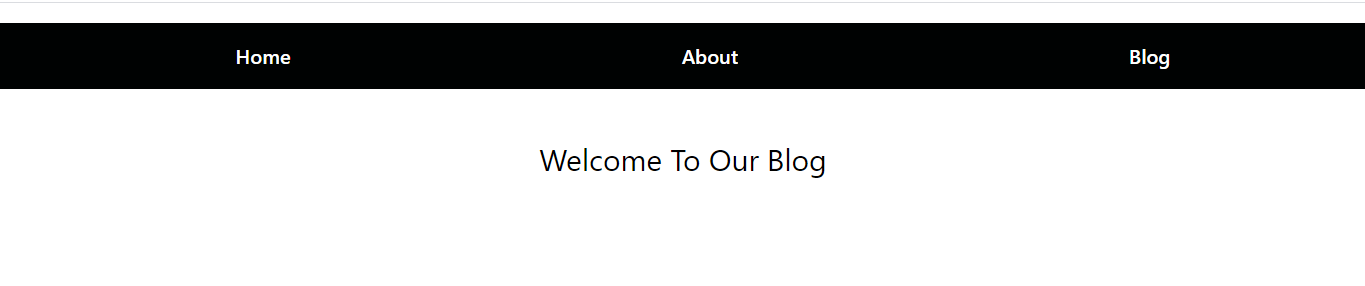
return <div className="message"> welcome to our blog</div>;
};
export default Blog;
In our App.js file, we return our BrowserRouter components renamed as Router. It is a parent component and should have only one child.
Inside the return of our App.js file, replace it with this code;
class App extends Component {
  render() {
    return (
       <Router>
           <div className="App">
           </div>
       </Router>
   );
  }
}
Next we create links to our components. the link uses the to props to point the location where the links should navigate to.
<div className="app">
       <ul className="nav">
          <li><Link to="/">Home</Link></li>
          <li><Link to="/about">About</Link></li>
          <li><Link to="/blog">Blog</Link></li>
       </ul>
</div>
Right now, if we click on the links, we can notice the URL changing according to the value in the to props specified in our Link component.
Next, we have to include the Route component which will establish the link between the component's UI and the URL, this is wrapped in the switch component.
       <Switch>
          <Route exact path="/" component={Home} />
          <Route path="/about" component={About} />
          <Route path="/blog" component={Blog} />
        </Switch>
Let us look at what is happening in the code above; The Route component has 2 props, as discussed earlier, the path and component props.
The path is the path name of our end point, The component is the component that will be rendered when we go to the page.
The exact keyword is used to match the exact value with URL. Using the exact keyword in our Route will render the component of it matches the path exactly but removing it will make our app to only render the Home page. path="/".
Wrapping our Routes in the Switch component enables the Switch to iterate over the Routes, find the one that matches the path and then the corresponding component to the path is rendered.
By now our App should look like this;
import "./App.css";
import { BrowserRouter as Router, Switch, Route, Link } from "react-router-dom";
import Home from "./components/Home";
import About from "./components/About";
import Blog from "./components/Blog";

function App() {
  return (
    <Router>
      <div className="app">
        <ul className="nav">
          <li>
            <Link to="/">Home</Link>
          </li>

          <li>
            <Link to="/about">About</Link>
          </li>

          <li>
            <Link to="/blog">Blog</Link>
          </li>
        </ul>

        <Switch>
          <Route exact path="/" component={Home} />
          <Route path="/about" component={About} />
          <Route path="/blog" component={Blog} />
        </Switch>
      </div>
    </Router>
  );
}

export default App;
Let us add a little styling to our App in the App.css file.
body {
  text-align: center;
}

a {
  color: white;
  font-weight: 600;
  text-decoration: none;
}

.nav {
  height: 10vh;
  margin-bottom: 20px;
  display: flex;
  justify-content: space-around;
  align-items: center;
  font-size: 20px;
  background-color: rgb(0, 2, 2);
  list-style: none;
}

.message {
  font-size: 30px;
  padding-top: 30px;
  text-transform: capitalize;
}
Now we can navigate between different components in our App and react router will keep our application UI in sync with the URL without reloading the page.
you can find the code on github


